The Dark Tower Dungeons is a place where you can fight enemies you already defeated, "recreated" by the Tower.[1] The Minions spectate these fights for enjoyment. [2]
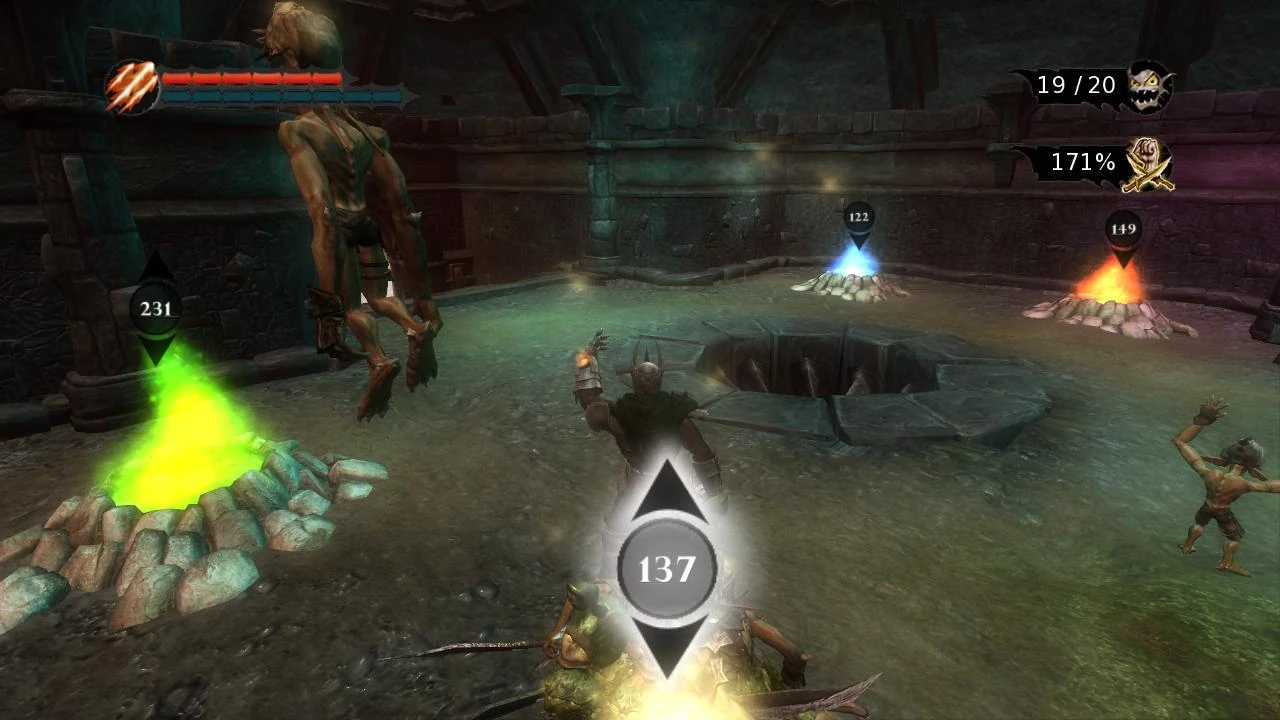
The Dark Tower Dungeons.
The Dungeons also serve as a way to acquire additional life force, and if his enemy has equipment his minions can access, then giving his minions equipment as well. To fight the later arena rounds it's recommend arcanium armor imbued with greens, browns and blues. Green for life regeneration, blues for increased health and brown for defense, because of the high difficulty.
General Strategy: The Ruborian Desert is both a great place to get Red Lifeforce and to equip your minions to the maximum 400%, both the origin area and the Village. Armor with both maximum defense and some Health regeneration is recommended, along with a mace enchanted for both normal and critical damage. Both of these will require Brown and Green minion forge sacrifices.
Important: Spells are disabled in the Dungeons.
Except where said, often a balanced horde of Browns, Reds, Greens, and Blues with a guard marker will get you through most fights. If farming for lifeforce, most often one of the 4 beetles, The Harvesting Helmet doubles lifeforce gained per orb. A simple tactic is to guard totem your minions into a corner of the arena and simply bring enemies to them, having more reds and greens allows for both ranged fire attacks and increased sneak damage respectfully. A few blues are always handy in case an enemy gets lucky or a minion does not return to the totem, while browns are a basic combatant to protect your other minions when the enemy attacks.
Enemies[]
Battler Beetle[]
Lifeforce: Brown
Number of Enemies: 25
Strategy: These beetles are the toughest beetles but you can do this on your own so you can use the harvesting helmet. With the rest of the armor just bash the beetles open with hatred and fun and what not. They only have a short ranged bite attack.
Bloody Unicorn[]
Lifeforce: brown
Number of Enemies: 7, back of the arena
Strategy: Place greens on guard marker and lure the unicorns in 1 by 1. They are a bit tough but be careful because if the Overlord lures more than 2 at once, then the greens will jump on a retreating horse and the others will come. Once they see the Overlord, they will snort and hit the ground before charging, only stopping when they hit the walls. They will drop their horns upon death.
Boulder Beast[]
Life force: all
Number of Enemies: 5, far edges of arena
Strategy: Upon entering the arena, at least 2 boulder beasts will immediately roll at The Overlord and his minions. The Overlord can put his minions in a guard totem, but it seems safer to keep them mobile. Until disturbed, they are rolled up into balls. When they spot the Overlord or a minion, they will give a low roar before rolling towards them, obliterating minions easily until they hit something. During their long recovery time, sweep your minions onto them until they die, helping with your weapon as well.
Dazzler Beetle[]
Lifeforce: Blue
Number of Enemies: 25
Strategy: The weakest beetles with blue life force. Even blues can defeat them (although they may die but blues can revive others), that just demonstrates how weak these bugs are. But like the battler beetle you can farm them and go solo so you don't need a smart helmet. They have a water attack which blues are immune to.
Dwarf Bomber[]
Lifeforce: Red and Brown
Number of Enemies: 5
Strategy: Leave the minions behind and simply move around the bombers. They will throw bombs at the Overlord, even if he is right next to them or their friends.
Dwarf Crossbowman[]
Lifeforce: Red
Number of Enemies: 10, around the far edges of the arena
Strategy: Overlord only may be a good strategy, as their crossbow bolts completely destroy minions without leaving a body most of the time, leaving little chance for revival. After they have fired a bolt, however, they tend to reposition, which can be used to easily swarm and destroy them. They drop moderate loot, often their bayonets and helms.
Dwarf Miner[]
Lifeforce: Brown
Number of Enemies: 25
Strategy: They utilize swarm tactics, similar to the Overlords. A balanced horde and guard marker should be placed close, with the overlord bringing over a few each time to minimize the risk. They drop their helmets, armor, and pickaxes.
Dwarf Warrior[]
Lifeforce: Brown
Number of Enemies: 10
Strategy: Same as Miner dwarves, only much stronger, slower, and fewer in number. The Overlord can also bait their attacks and they turn slowly, allowing for reds to melt them from afar. They will focus on whatever is closest to them. They drop their helmets, armor, and double bladed axes.
Fallen Knight[]
Lifeforce: Brown
Number of Enemies: 15
Strategy: These knights are not very strong but it is recommended micro managing reds on a guard marker. They are simply hardy attackers, luring a few to a guard totem at a time should be an adequate strategy.
Flamer Dwarf[]
Lifeforce: Red
Number of Enemies: 10, spread around far edge of arena
Strategy: Keep a guard tower of reds in the middle of them so they can distract the flamers. Let them spray their flames at the immune reds, then use greens or attack with the Overlord themselves. Be wary of their explosion upon death, which sounds similar to an activated bomb but does less damage. They drop eagle helmets and armor.
Forest Troll[]
Lifeforce: All
Number of Enemies: 8, middle of the arena
Strategy: The horde in the middle of the arena, where 2 will always begin thundering towards the overlord and his minions. Either keep moving or settle in a far corner of the arena. Keep in mind their belly flop attack will hit, even if they are returned to standing, unless they are killed before the move happens.
Ghost Elf[]
Lifeforce: Blue
Number of Enemies: 20, triangle
Strategy: Although blues are weak and do little damage, they do more damage to elves than browns do to anything. Just charge in with 50 blues. The Overlord might want to help even though you can't do damage but the AI considers you as someone who will kill an invincible creature although only blues can. Instead of a guard totem, simply sweep all your blues into the thick of it.
Halfling Cook[]
Lifeforce: Brown
Number of Enemies: 10, a line
Strategy: Reds are most effective against them. They turn slow and attack with cleavers, reds outranging them. They drop sides of meat, their cleavers. and their hats.
Halfling Rocklobber[]
Lifeforce: Brown
Number of Enemies: 15. 3 groups of 4, 1 group of 3
Strategy: Reds out range them and they panic when on fire, and are rather weak otherwise. They may drop some armor.
Halfling Spearman[]
Lifeforce: Brown
Number of Enemies: 20, 18 in a line in the middle, 1 on both ends
Strategy: Just send greens to jump on them. Place a guard totem in a corner and simply lure them to charge near the totem. They may drop their armor, their spears, and some gold.
Halfling Swordsman[]
Lifeforce: Brown
Number of Enemies: 15
Strategy: They are so weak that even a blue massacre would work but it doesn't work 100%. Anyway reds and browns or greens would work but I recommend greens solo. Speaking of solo you can do it solo. They easily will be lured towards the overlord and his waiting minions. They may drop gold, swords, or armor.
Hulking Toad[]
Lifeforce: Blue
Number of Enemies: 5
Strategy: They are like frogs but now hulking. They leap around which does damage and severe knockback. They can swallow a minion whole and if not killed in time, will dissolve the minion entirely.
Magma Beetle[]
Lifeforce: Red
Number of Enemies: 25
Strategy: These beetles you can farm. It is dangerous when using greens and blues but they still are as good as dead when you charge in solo. They have an erupting flame attack which reds are immune to.
Puff Beetle[]
Lifeforce: Green
Number of Enemies: 25
Strategy: Like all beetles they can be farmed. Their flying attack does no damage to greens and greens on a flag will instant kill them or kill them in 2 seconds. I still recommend solo. They can produce a toxic cloud which greens are immune to.
Ruborian Bomber[]
Lifeforce: Red
Number of Enemies:10
Strategy: Use reds on a flag and micro them to victory. If they get to close move the reds away and the bombs they throw are pure fire (and a little bit of knockback) so they don't hurt reds at all. In fact, they don't even throw bombs on a fire immune creature. However, they will attack reds with their swords, be careful as even maxed out reds cannot handle the sword strikes.
Ruborian Fighter[]
Lifeforce: TBA
Number of Enemies: 10
Strategy: They tend to toss their darts which instantly down most minions, even maxed out ones.
Red Priest[]
Lifeforce: Red and Brown
Number of Enemies: 5
Strategy: Cultists of Sir William the Black's cult The Red Dawn, they stand little chance against any minion horde or even the Overlord themselves.
Rock Giant[]
Lifeforce: All, mostly red and brown
Number of Enemies: 5
Strategy: In arcanium armor, my armor recipe and axe with full damage you can solo this. They do knock back on all their attacks but if all of them attack there is only room for 3 to attack. Remember if you have arcanium regen and damage, the rock giants cant hurt you because their DPS is too low and all they have is knockback. You can solo it.
If you need to play safe, simply summon all Reds and put Marker for them near the Gate. Then proceed to slowly lure the Rock Giants to your side one by one, by slowly moving to them (I recommend picking on the one in one corner and work your way to the other side to avoid pulling 2 at once). Once near the Reds, stay, lock on the target and simply do side steps as it start the attack animation until you come to it's right/left side. Hit it a couple times and repeat. The Reds will do most of the work for you (as it pretty much impossible to miss something that huge).
A Green massacre works wonders. Simply flag them into a corner, wait for them to turn invisible, then lure a rock giant nearby, preferably to the middle of the area. While there is a chance they will ground slam some, in which case some blues could be used, or they won't notice them at all, even when they are slashing into its back.
Skull Boar[]
Lifeforce: Brown
Number of Enemies: 15
Strategy: Everyone might say "Oh my god I can't do this" but they are wimps to think that. Just place reds on a flag and melt them to death. They are slow to follow the overlord, with long wind up times for their attacks. Be aware their hammer strike will hit the overlord even when behind them.
Skull Rat[]
Lifeforce: Brown
Number of Enemies: 30
Strategy: These are very weak but there are lots of them. A massacre with browns will work. They will drop their skulls. Be careful as they tend to stick together and compound their weak arrow attacks, however moving around should keep enough arrows missing to reduce damage taken.
Skull Stag[]
Lifeforce: Blue
Number of Enemies: 5
Strategy: Solo will be tough because they do revive each other. The best think to do is annoy them so they make their attack and sweep greens in with a flag and they are so dead you can't call them dead. While they do revive each other, it has a generous amount of time and keeping on the pressure should crack them before they can fully revive them.
Slug[]
Lifeforce: Green
Number of Enemies: 10
!WARNING! THIS ENEMY IS EXTREMELY DANGEROUS, PROCEED WITH CAUTION.
Strategy: Slugs are the most dangerous you will ever face. I discovered something when i was fighting succubi. Go out as if you did it solo and then once the gates are closed summon reds from behind the gate. Some of them you wont be able to control but sweep the ones you can back on a guard marker and then lure the slugs to the reds. Attack them from behind. Keep moving the slugs back and forth until they all die. You really don't need reds but it is just for a permanent softener as greens are temporary. Don't be worried if you die because there is like a 20% chance you will get this right.
The slugs move slowly and have a small attention span, but where they spawn tends to make them all move at once, so spreading them out is key. They easily stay together so keep moving.
Sluglet[]
Lifeforce: Green
Number of Enemies: 5
Strategy: You don't need the tutorial but I will tell you that 1 brown wont defeat them all but 1 green will. Greens are immune to the sluglet attacks. I discovered this in the arcanium mine where you need to defeat the mother slug to stop the other slugs from spawning. Anyway solo works 100% (unless your in steel armor)
Succubus[]
Lifeforce: Red
Number of Enemies: 5
Strategy: It would be hard for me to explain this because I usually experiment on them all the time. I discovered that, they can detect greens on a flag, the attack of blues doesn't hurt the succubus and I know it is not their useless damage because they say "magic no hurt it". The attack of blues also makes a succubus unable to move or attack or do anything but that can change if you attack a succubus. The best way that i think does it is greens on a flag. The succubus with its eagle eyes will see the greens or smell them as greens smell. The succubus will make a minion's black heart all fluttery (As Gnarl says in Overlord 2) and fly down. They greens will jump on her back and when she flies away she is carrying at least 3 smelly greens. A mace with knockback especially helps.
Troll[]
Lifeforce: Brown
Number of Enemies: 2
Strategy: Unlike forest trolls these ones are cheap. Just send in greens or browns and you won't have to worry about the body slam but if you want to play safe use reds.
White Priest[]
Lifeforce: Brown and Blue
Number of Enemies: 5
Strategy: Even though they can revive themselves, The overlord can murder them himself personally. They are that weak. While luring them is a potential tactic, sweeping a decent horde often kills them quicker than the Overlord can blink.
Zombie[]
Lifeforce: None
Number of Enemies: 50
Strategy: Mostly just a massive swarm enemy. Simply lure them to a guard totem to be safe, or potentially sweep them with a large enough and strong enough Minion horde.
Zombie Lord[]
Lifeforce: None
Number of Enemies: 10, 5 groups of 2
Strategy: Blues are immune to their magic missiles but not their sword slashes. A blue rush could work, but take care not to have more than half be downed, otherwise you could lose a Blue forever.
Raising Hell Dungeon Expansion[]
Undead Swordman[]
Lifeforce: None
Number of Enemies: 20, 5 groups of 4
Strategy: The swordmen are eager to fight, charging after the Overlord and his minions rather quickly.
Undead Commander[]
Lifeforce: None
Number of enemies: 5
Strategy: They are like the Swordmen, only bigger, fewer in number, and with massive axes. They drop armor and smaller axes.
Undead Musketeers[]
Lifeforce: None
Number of enemies: 20. 5 groups of 4, far back
Strategy: They can defeat the Overlord and his minions quickly with sheer volume of fire. While a sweep could be good, they may take too much damage beforehand. At low health they will revert to Undead Swordmen. A tactic recommended is to wait for 4 shots, then sweep the minions in during their reload.
Undead Shock Trooper[]
Lifeforce: None
Number of enemies: 7
Strategy: While not as eager as their friends, they are far more dangerous. Be sure none hit the Overlord's minions, as they completely disintegrate them on impact. However, they can hit each other, stunning them for a time.
Undead Reaper[]
Lifeforce: None
Number of enemies: 2, different corners at the back
Strategy: They will continually summon Undead Swordmen once the Overlord and his minions are close to them. Sweep into them quickly and also support with the Overlord's weapon.
Halfling Challenge[]
Requirements: Finish all Halfling Dungeon Missions
Lifeforce: Brown
Number of Enemies:
10 Halfling Rocklobbers, Far back row
10 Halfling Swordsman, Far front row
5 Halfling Spearman, Front lines
4 Halfling Cooks, 1 on each end, 2 in the middle
Strategy: The Spearman are eager to charge, but the rest are willing to stay back.
Skull Tribe Challenge[]
Requirements: TBA
Lifeforce: Brown from rats and boars, Blue from Stags
Number of Enemies:
10 Skull Boars
5 Skull Stags, Middle most row,
20? Skull Rats
Strategy: The skull boars can destroy a minion in a swing, tend to move in groups, and their hammer strikes are deceptively far, often in a small radius around them and not just the hammer strike. The stags can revive the others, however they will not run to faraway casualties. The rats harry the Overlord quite easily. Lure some rats to a guard totem and let the reds burn them to death. If close enough, the stags will run out to heal them, but instead of directly attacking, let the reds fireball the stags to reduce the chance of being crowded and pounded by boars and rats. A decent tactic is to run around and cause the boars to slam down their hammers, but be sure to kill the rats as they will continually and slowly hit you.
Dwarf Challenge[]
Requirements: TBA
Lifeforce: Lots of red, some brown
Number of Enemies:
6 Dwarf Warriors
10 Dwarf Crossbowmen
5 Dwarf bombers
10 Dwarf miners
Strategy: The crossbowmen do a lot of damage rapidly. The dwarven bombers can easily do most if not all the work for the Overlord as they throw their bombs without regard for anyone. The miners will quickly charge after the overlord, being lured easily to waiting minions.
Monster Challenge[]
Requirements: TBA
Lifeforce: All
Number of Enemies:
3 Boulder Beasts
6 Trolls
2 Rock Giants
Strategy: The Boulder Beasts are easily lured to the Overlord's waiting minions. The Rock Giants will charge forward before the trolls. The trolls, while more numerous, also are fairly weak considering their company.
Undead Challenge[]
Requirements: Defeat the Undead Swordman, Commander, Musketeer, Shock Trooper, and Reaper challenges.
Lifeforce: None
Number of Enemies:
10 Undead Musketeers, Back row
10 Undead Swordmen, Middle Row
1 Undead Reaper, Middle
3 Undead Commanders, surrounding the Reaper
3 Undead Shock Troopers, Front lines
Strategy: Deal with the Shock troopers first before they destroy all the minions, especially when you aren't looking. All of them seem to only charge once the Overlord or his minions get to the middle of the arena, turning back if they cross the line.
Trivia[]
- Sandworms, Water Serpents, Magma Giant, Venomous Zombies, Zombie Commanders, Wisps, little beetles, Rams, Beholders, Peasants and bosses do not appear in the Arena.
- After the return of the Second Overlord, the Jester will no longer commentate on the dungeon fights, however only if the Raising Hell expansion is in effect.
- Defeating all the normal monsters will grant the Dungeon Overlord Achievement/Trophy.
- Subsequently defeating the challenges and the Undead added by Raising Hell will grant the Dungeon Legend Achievement/Trophy.
- ↑ "The Tower can recreate many of the enemies you've conquered, so you can kill them again, at your leisure" - Gnarl explaining the Dungeons' purpose (Tower_Dungeon@101@20.mp3 found in Overlord\Language\ENGLISH\Tower_Dungeon)
- ↑ "Good evening, Minions! Welcome to fight time! It's dreary, dark and dank here in the dungeon, just how we like it!" - Upon entering the dungeon, can also be heard in Tower_Dungeon@200@10.mp3 and Tower_Dungeon@200@20.mp3